Precision and Affection: Crafting a Wood Architectural Model
Building Connections Through Architectural Modeling
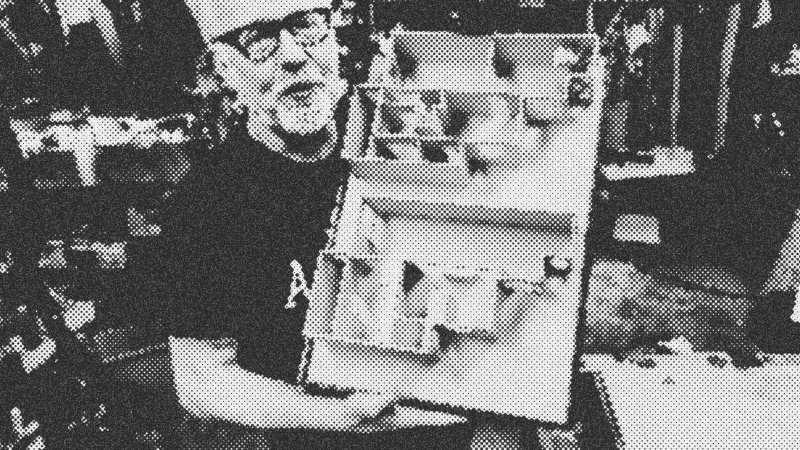
There is something uniquely grounding about holding a physical representation of a space in your hands. Adam Savage recently took this to the next level by transitioning from his standard foamcore methodology to a more permanent wood-based build. The goal was to create a 1/35th scale architectural model of a friend's new home in San Francisco. While most builders see a house as a collection of studs and drywall, an architectural model allows you to parse the flow of a home and understand its geometry in a way that walking through the front door never can. This project wasn't just about the technical challenge; it was an "affection build," a physical manifestation of a housewarming gift that doubles as a tool for the new homeowners to plan their future lives.
Scaling is the first major hurdle. In 1/35th scale, standard interior walls translate to roughly 1.8 inches in height. For this project, Adam Savage moved away from the quick-and-dirty method of eyeballing foam walls. Instead, he utilized a master document of measurements taken on-site. This level of precision requires a shift in mindset from hobbyist crafting to light engineering. When you build in wood, you lose the forgiveness of foam but gain a tactile weight and durability that makes the model feel like a legacy object rather than a temporary mockup.
Essential Tools and Materials
To replicate a high-precision build like this, you need to step out of the craft drawer and into the machine shop. The switch to wood necessitates tools that can handle rigid material with surgical accuracy. Unlike foam, which yields to a sharp X-Acto blade, wood requires milling and sawing to ensure the walls remain perfectly plumb and the layout stays true to the blueprint.
- Material: 1/8-inch thick wood strips (milled to consistent thickness).
- Milling Machine: Essential for hogging out precise floor layouts and cleaning up errors.
- Table Saw with Sled: A small-scale sled is vital for making repeatable, square cuts on tiny wall segments.
- Carpet Tape (Double-Sided): This is a secret weapon in the shop for securing workpieces to the mill bed without mechanical clamps that might crush the wood.
- Hot Glue Gun: While the build is high-tech, hot glue remains the king of rapid assembly, providing enough hold for stability while allowing for future modifications.
- Milling Bits: A four-flute bit at high speed provides a cleaner finish on wood grains.
The Step-by-Step Assembly Process
- Surveying and Mapping: Begin by taking exhaustive measurements of the physical space. Adam Savage prefers the "unrolled shopping bag" method for sketching, which provides a large, tactile surface for capturing every nook and cranny before transferring those dimensions to a clean floor plan.
- Milling the Layout: Use a milling machine to carve the floor plan into a baseplate. This provides a "track" for your walls to sit in, ensuring that the footprint of the house is perfectly accurate. If you make a mistake or over-torque the bit, you can mill out the error, pop in a wood plug, and recut the section.
- Wall Preparation: Rip your wood stock to the exact height required (1.8 inches for 1/35th scale). Using a table saw sled ensures every segment is identical. Consistency here prevents the "wavy roof" syndrome common in amateur models.
- Dry Fitting and Troubleshooting: Lay the walls into the milled tracks without glue first. This is where you'll catch overlapping corners or missing door frames. It is easier to recut a single wall segment now than to pry it up later.
- Adding the Details: Once the primary structure is set, focus on the interior life of the model. Adam Savage added kitchen cabinets and countertops using small wood blocks secured with dots of hot glue. These details provide the scale reference necessary to "feel" the room's volume.
- Final Cleanup: Woodworking at this scale creates a massive amount of fine dust. Use a vacuum and a soft brush to clear the tracks before the final assembly to ensure the glue bonds to the wood, not the debris.
Troubleshooting the "Dumb" Mistakes
Even a seasoned pro like Adam Savage runs into setbacks. During this build, a lapse in focus led to cutting a piece out of a critical structural part, requiring a total remake of that section. The lesson here is simple: never rush the final 10%. When you feel the "stopping point" approaching, that is exactly when you are most likely to take a bad notch out of a wall or misalign a joint. If you do screw up, don't try to patch it with filler. In a wood model, the grain and seams are visible; it is almost always faster and cleaner to remake the part from scratch than to try and hide a mistake.
Another common pitfall is heat buildup during milling. If you run your bits too slow or use the wrong flute count, you can scorch the wood or cause the carpet tape adhesive to liquefy, leading to part slippage. Keep your speeds high and your passes light. Finally, be wary when peeling tape off the mill bed; it’s the easiest way to catch your hand on a sharp bit. Safety isn't a suggestion—it's a requirement for staying in the game.
The Reward of a Tangible Perspective
The finished model is more than a toy; it’s a document of fellowship. By building in wood and using light adhesive, the model remains modular. If the homeowners decide to add a deck or knock out a wall in the real world, the model can be updated to reflect those changes. Building an architectural model of a space you love forces you to look at every corner, every hallway, and every window with intention. It turns a house from a place where you keep your stuff into a puzzle that you have successfully solved. Whether you are building for yourself or as a gift, the process of bringing a machine—or a home—to life in miniature is a masterclass in spatial awareness and practical craft.
- Adam Savage
- 45%· people
- carpet tape
- 9%· products
- foamcore
- 9%· products
- milling machine
- 9%· products
- Norman Chan
- 9%· people
- Other topics
- 18%
Adam Savage's One Day Builds: Wood Architectural Model!
WatchAdam Savage’s Tested // 36:05

Adam Savage’s Tested is a content platform and community playground for makers and curious minds. On Tested.com, the highly- engaged Tested YouTube channel, and at conventions and events, dynamic makers share ideas and inspire each other to build their obsessions. Led by Adam Savage, the Tested team explores the intersection of science, popular culture, and emerging technology, showing how we are all makers. Adam also takes viewers behind the scenes of films, TV shows, theater, and museums, shining a spotlight on the craftspeople and artists who make the magic we all enjoy. Tested is also: Norman Chan, Joey Fameli, Josh Self, Kristen Lomasney and Thomas Crenshaw.