Customizing the Ultimate Edge: Modding the TSPROF Sharpening System
Precision Sharpening for Wide-Blade Tools
There is a massive difference between a tool that looks sharp and one that actually performs. Achieving a truly lethal edge on a wide wood chisel requires more than just a steady hand and a whetstone; it requires mechanical consistency. The TSPROF sharpening system is widely regarded as a pinnacle of precision engineering for knives, but even the best out-of-the-box solutions occasionally hit a wall. When dealing with a heavy 2-inch chisel, the standard holders often lack the surface area or clamping force to prevent the blade from shifting during high-pressure grinding.
This guide explores how to push a professional sharpening system beyond its factory limits. We are going to build a custom aluminum attachment that bridges the gap between a standard knife clamp and a heavy-duty chisel mount. By the end of this process, you will have a machine capable of putting a "click-spring" sharp edge on the widest blades in your workshop, ensuring that every pass with the diamond plate is perfectly indexed to the existing bevel.
Tools and Materials Needed
To execute this modification and subsequent sharpening, gather the following components:
- Sharpening System: TSPROF K03 or similar precision guided sharpener.
- Abrasives: Diamond plates ranging from 150 grit (for reprofiling) to 1000 grit (for finishing).
- Stock Material: A block of 6061 aluminum (roughly the width of your chisel).
- Hardware: M5 thumb screws and Helicoil (M5x0.8) for durable threading.
- Layout Tools: Permanent Sharpie marker and a digital angle finder.
- Machining Tools: Drill press, tapping set, and a bandsaw or milling machine to shape the aluminum capture piece.
Designing and Machining the Custom Holder
Standard chisel holders often struggle with the "neck flange" of larger tools, causing them to sit unevenly. To fix this, you must fabricate a capture piece that screws directly into the TSPROF assembly. Start by marking your aluminum stock to match the mounting holes of the original carriage. Precision is key here, but as long as the clamp remains parallel to the sharpening arm, you have some wiggle room on the external aesthetics.
After cutting the block to size, drill and tap the mounting holes. While 10-24 threads are common, using M5 Helicoil allows you to reuse the high-quality thumb screws that ship with the TSPROF unit. This keeps the ecosystem consistent. The custom attachment should provide a wide, flat surface that allows the 2-inch chisel to be clamped down with maximum surface contact, eliminating the "wobble" found in narrower adapters.
The Step-by-Step Sharpening Process
Once the custom hardware is mounted, the sharpening process follows a strict hierarchy of grits:
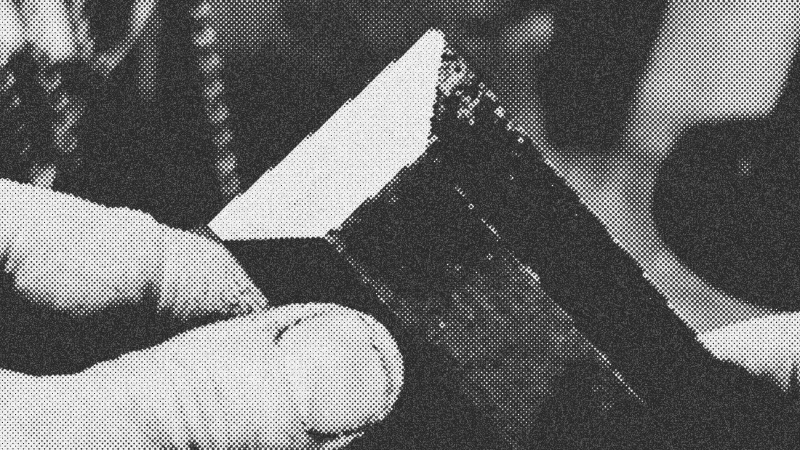
- The Sharpie Test: Coat the entire bevel of the chisel with a permanent marker. This is the only way to verify your angle. Swipe a fine diamond plate across the surface; if the marker disappears only at the tip or the base, adjust the TSPROF arm until the scratch pattern covers the entire face.
- Establish the Bevel: Start with a 150-grit diamond plate. If the edge is beaten up or chipped, you need to "take off some meat." Don't rush this stage. You are looking for a uniform scratch pattern across the whole width of the blade.
- Progressive Refinement: Switch to a 200 or 400 grit plate once the geometry is established. The custom holder allows for a longer throw, meaning you can use more of the stone's surface area per stroke.
- The Polished Edge: Move through to 1000 grit. At this stage, you are no longer removing material to change the shape; you are removing the scratches left by the previous stones.
Tips and Troubleshooting
If you find the chisel isn't cutting cleanly despite a high-grit finish, check for a burr on the flat back of the tool. Use a fine stone to "lap" the back of the chisel perfectly flat; otherwise, the sharp edge will be bent over rather than standing true.
Another common issue is "mission creep" during the build. It is easy to get caught up in making the aluminum adapter look like a piece of jewelry. Focus on the mating surfaces—the parts that touch the tool and the sharpener. If those are flat and true, the rest is just window dressing. If your thumb screws feel loose, the Helicoil are your best friend. They provide steel-on-steel contact that won't strip out like raw aluminum threads.
Final Results and Benefits
A successful modification results in a tool that feels like a natural extension of the machine. By building your own attachment, you gain the ability to sharpen specialized gear that the manufacturer never intended to support. The result is a 2-inch chisel that can shave hair and slice through end-grain wood like it’s butter. There is a profound satisfaction in using a machine you’ve personally optimized to bring a dead tool back to life.
- TSPROF
- 56%· products
- Helicoil
- 33%· products
- Adam Savage
- 11%· people
Adam Savage's Favorite Blade Sharpening Tool!
WatchAdam Savage’s Tested // 26:49

Adam Savage’s Tested is a content platform and community playground for makers and curious minds. On Tested.com, the highly- engaged Tested YouTube channel, and at conventions and events, dynamic makers share ideas and inspire each other to build their obsessions. Led by Adam Savage, the Tested team explores the intersection of science, popular culture, and emerging technology, showing how we are all makers. Adam also takes viewers behind the scenes of films, TV shows, theater, and museums, shining a spotlight on the craftspeople and artists who make the magic we all enjoy. Tested is also: Norman Chan, Joey Fameli, Josh Self, Kristen Lomasney and Thomas Crenshaw.