The Artisan's Guide to Crafting a Custom Bookbinding Finishing Press
The Significance of the Finishing Press
In the sacred art of bookbinding, the finishing press stands as a silent sentinel. While basic heavy weights or boards can suffice for simple compression, a true finishing press provides the precision required for the delicate work of spine decoration. It elevates the book, allowing the artisan to apply gold leaf, leather, or intricate tooling with steady hands and clear access. Constructing your own press honors the tradition of the self-sufficient craftsman who understands that the quality of the tool directly influences the integrity of the final object.
Essential Materials and Dimensions
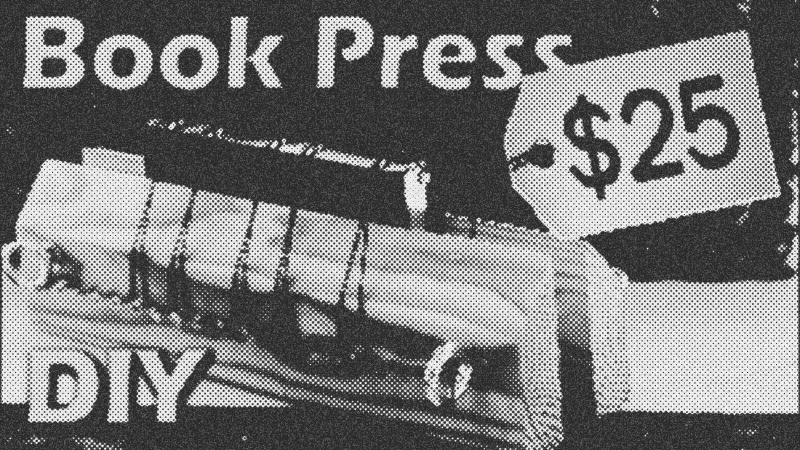
To build a press that will endure decades of use, begin with a board approximately two inches thick and six inches tall. You will need two lengths of about 18 inches each. For the mechanical assembly, secure two 3/8-inch eye bolts (six inches long), two wing nuts, two acorn nuts, and four washers. You also need roughly 50 screws with unthreaded shanks near the head and several lengths of durable cord. These components transform simple lumber into a specialized instrument capable of exerting even, adjustable pressure.
Shaping and Preparation
Precision begins with the cut. After dividing your board, clamp the pieces together and run them through a table saw at a 45-degree angle to create a beveled top edge. This beveling is critical; it provides the clearance necessary for your hands and tools to reach the very edges of the book's spine. Drill holes at each end for the eye bolts, ensuring they are perfectly aligned. Sand every surface until it is smooth to the touch, but avoid applying finishes like oils or stains to the inner faces where the wood meets the book, as these chemicals can leach into precious paper and leather.
Assembly and Cord Tensioning
Insert the eye bolts through the boards, cushioning them with washers and securing them with wing nuts. The acorn nuts serve as protective caps, preventing the threaded metal from snagging your clothing or marring your workspace. Along the lower third of the outer planks, install the screws at regular intervals to act as pegs. These pegs allow you to wrap the cord across the spine’s raised bands, ensuring the leather adheres perfectly to every contour of the book's architecture.
Mastery Through Application
Your completed press is more than a clamp; it is a versatile station for leather gluing and spine painting. By adjusting the wing nuts, you can accommodate a slim volume or a massive tome. This DIY approach not only saves the artisan hundreds of dollars but also creates a deeper tactile connection between the binder and their tools. The result is a piece of heritage equipment that reflects the same care and discipline found in the books it helps create.
- Austin Andrus
- 25%· people
- Eye bolts
- 25%· products
- Finishing Press
- 25%· products
- Wing nuts
- 25%· products
DIY Bookbinding: Quick and Affordable Finishing Press Build
WatchIngenius Designs // 5:05

At Ingenius Designs, we collect hobbies like some people collect stamps, but unlike stamps we don't want to leave the collection in a dark closet somewhere. Join us as we share our art and other creations, along with tutorials for any discoveries we make along the way!