Lombo and Stevie clinch transport victory as Cintilla speed overcomes ramp chaos
The High-Stakes Calculus of Power-to-Weight Ratios
The BeamNG.drive transport race introduces a unique mechanical puzzle that transcends traditional racing: the shared power-to-weight ratio. By capping the combined performance of the transport vehicle and the race car at 0.4, the competition forces teams to make a critical trade-off. A team can opt for a high-torque, heavy-duty truck to dominate the first lap, but they will inevitably suffer on the second lap with a sluggish, underpowered car. Conversely, a lightweight, fast race car requires a slower, potentially unstable transport vehicle.
During the heats, this tactical divide became apparent. Rusky and Impega prioritized the performance of their 800 Series car, leaving their truck struggling with severe weight distribution issues. The rear-heavy load caused the truck to wheelie during turn one, lifting the front tires off the tarmac and stripping the driver of steering control. This highlights the inherent danger of the 'fast car' strategy; if the transport vehicle cannot navigate the corners of the circuit, the superior speed of the car becomes a moot point. Success in this format requires a delicate equilibrium where the truck is just stable enough to survive the first lap without hemorrhaging too much time.
Mechanical Failure and the Loading Dock Gamble
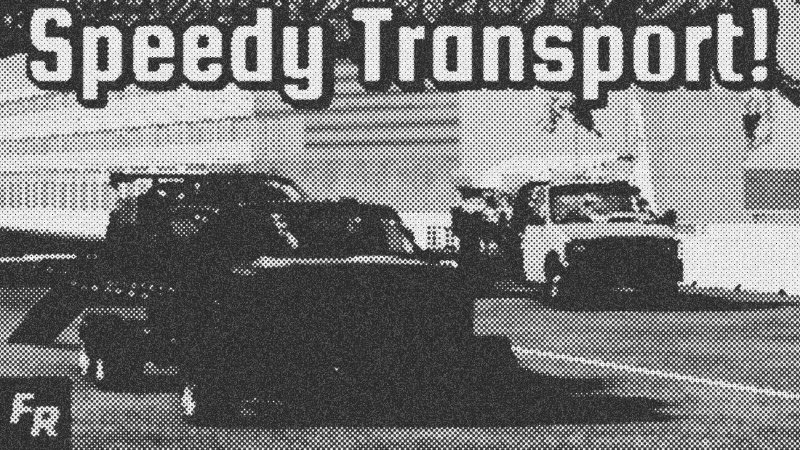
The transition between the transport lap and the solo lap—the dismount—is the most volatile phase of the race. Even with a significant lead, a team can see their victory vanish if the race car becomes 'beached' or stuck in the truck's geometry. In the opening heat, Danger Man experienced this firsthand when his BX Series car caught on the ramps, refusing to slide off cleanly. This mechanical snag allowed competitors to close a massive gap, though they ultimately failed to capitalize on the error.
Loading strategies also varied wildly. While most teams approached the ramps with caution, Blazer and Shadows attempted a high-speed 'jump' to load their I-Series. While the maneuver was visually spectacular and technically successful, the impact bent the trailer’s frame. This damage, though seemingly cosmetic, often alters the vehicle's physics in BeamNG.drive, leading to 'bunny hopping' and unpredictable suspension behavior in subsequent corners. The lesson here is clear: aggression during the loading phase offers a temporal advantage but risks terminal structural damage that sabotages the car's grip for the final lap.
Defensive Trucking and the Geometry of the Track
A recurring strategy in transport racing involves using the sheer mass of the truck to block narrow sections of the circuit. However, the track chosen for this event featured wide corridors that neutralized this 'wall' tactic. Shadows utilized a massive truck with significant blocking potential, but the wide-open nature of the circuit allowed faster combinations like Lombo and Stevie to find gaps that would be nonexistent on a tighter circuit like the Hirochi Raceway.
Without the ability to physically block, the focus shifted to straight-line torque. The Cintilla driven by Stevie proved to be a formidable asset, provided it could actually exit the transport bed. The truck's height played a hidden role in the physics of the dismount; a higher bed creates a steeper ramp angle, increasing the likelihood of the car bottoming out or getting stuck in the 'sand' traps near the start-finish line. Stevie managed to overcome a disastrous spin during the final dismount only because the Cintilla's raw acceleration allowed for a rapid recovery that the BX Series could not match.
Lessons from the Spanner Final and Tactical Evolution
The 'Spanner Final'—the second-chance bracket for teams that failed their initial heats—revealed the importance of procedural discipline. Rusky and Impega lost their initial qualifier not due to a lack of speed, but because they accidentally lowered their ramps too early on the straightaway, creating massive aerodynamic drag and mechanical instability. In the final rounds, the teams that succeeded were those that treated the transport vehicle not just as a vessel, but as a precision instrument.
Lombo and Stevie's ultimate victory was a testament to reliability over pure spectacle. While other teams experimented with jumps or massive trucks, they focused on a combination that could survive the 'kick' of the dismount. The Cintilla's ability to regain traction after a high-speed exit from the truck bed ensured that even with a gearbox mishap, they could maintain their lead. For future events, the data suggests that the 'sweet spot' for the power-to-weight ratio lies slightly more toward the car's performance, provided the transport vehicle has enough front-end weight to prevent the disastrous wheelies that plagued the 800 Series teams.
- Stevie
- 15%· people
- Cintilla
- 11%· products
- BeamNG.drive
- 7%· games
- BX Series
- 7%· products
- Impega
- 7%· people
- Other topics
- 52%
Our Fastest Transport Race Yet! - BeamNG Drive
WatchFailRace // 30:43

FailRace is a place where cars are raced, rolled, put through incredible challenges and sometimes crashed rather spectacularly all for your entertainment on some of the best driving video games around. If you are feeling super generous you can help support this channel on patreon :), the link can be found below